
Table of Contents
A timber sash window installation is an organised process that runs in three cycles: pre-installation, installation, and post-installation. Each stage has its own decisions and tests that directly affect the performance of the completed windows. Rushing up any step will lead to issues which will be very expensive to rectify once the frames are in place. This guide breaks down the complete process for timber sash windows, phase by phase, so every stage is clear before work begins.
Timber sash windows: Pre-Installation
Window survey
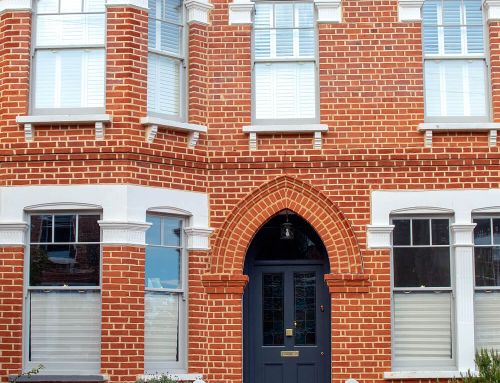
The installation process begins with a professional site survey. The surveyor accurately measures all openings, checks the depth and condition of the masonry and lintels around them, and verifies whether the building is in a conservation area or under listed building restrictions.
The survey determines which installation route is suitable. If the existing box frames are structurally sound, new sashes can be installed directly in the existing frames, maintaining the originality, internal linings, and details while reducing overall cost. If a frame rots or shows structural movement, a complete replacement of the box frame is the only reliable option.
The bespoke timber sliding sash windows are manufactured from measurements taken on site, which is why a window survey is important before installation.
Selecting the right timber
The timber species affects the durability of the windows and the maintenance that they will require.
Accoya wood has a 50-year anti-rot guarantee and retains its shape significantly better than untreated softwood during seasonal changes. For timber sash windows London, where there are wet winters and city pollution, the lower-grade materials will deteriorate easily. Therefore Accoya is the surest specification to use.
Engineered redwood is also a reliable substitute with a 15-year warranty, and would be more appropriate on a project where cost is a bigger consideration.
Glazing specification
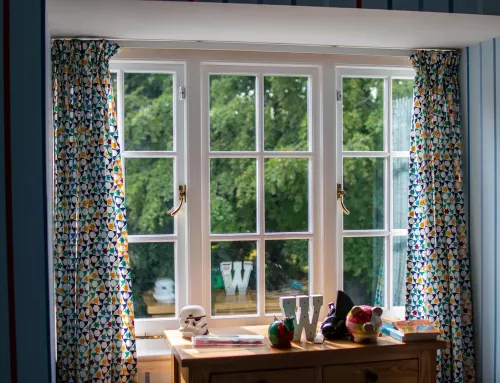
Then comes the glazing specification, which is verified against the planning conditions and thermal requirements. Listed buildings and most conservation area properties still require single glazing.
In locations where double glazing is allowed, slimlined sealed units are used in the narrower profiles required by timber frames, thus improving heat retention and noise reduction. Thus, the acoustic, safety, and obscure glass are chosen based on the windows’ position and purpose.
Timber sash windows: Installation
After the pre-installation move, here are step-by-step instructions for installing timber sash windows.
Removing the existing windows
First, the old sashes are removed, and then the box frames are removed if a complete replacement is needed. It is carried out carefully to ensure the removal protects surrounding plasterwork, internal linings, and external masonry. Then the old fixtures and debris are completely removed, and the opening is fully cleared before adding the new components.
Fitting the new frames
The new box frames are then installed into the opening, checked for level, plumb, and square, and then fixed in the masonry. The internal linings, pulley stiles and back linings are then fixed in their proper order. The glaziers then verify each step to ensure everything is in line before fitting the balance system, because any mistakes made at this stage will affect how the sashes are suspended and how they work afterward.
Installing the balance system
Before the sashes go in, the balance systems are installed, as verified during the survey stage. In period properties, the cords-and-weights system is generally used, in which sash weights are located in the box frame and attached to each sash via cords running over pulleys. This keeps both sashes balanced and allows them to slide freely at any position.
If a wall depth is too shallow to accommodate the weight box, a spiral balance is used instead. It achieves the same smooth operation through a spring mechanism built into the frame, without needing additional depth.
Hanging, adjusting and sealing the sashes
Lastly comes the handing and sealing of the sashes. The bottom sash is hung first, then the parting bead, then the top sash. Each sash is then tested in all ways for correct weight balance before the staff bead is fixed. Both sashes are then adjusted until they slide freely without any binding or resistance.
Brush pile draught seals are fitted to the staff beads, parting beads, and meeting rail, and every contact point is checked for consistent compression.
Timber sash windows: Post-Installation
After installation, the post-installation steps determine the final factors. Here is what is included:
Sealing and finishing
Once the sashes are operating correctly, the surrounding areas are repaired. All gaps between the new frame and the other masonry are sealed with externally flexible paintable mastic. Internally, any disturbed plaster or render is replaced and made ready for decoration. Windows with a factory-applied microporous finish require only minor touch-ins for cut edges and fixings. All bare timber is primed and top-coated before being handed over.
The handover check
Finally, after the installation is done, a final check is done. Both sashes are tested through their full range of movement; draught seals are checked at all meeting points; glazing units are checked for seal integrity; and everything is checked to ensure it is in working order.
Conclusion
Every phase of a timber sash window installation is constructed upon the previous stage. The survey determines the manufacture; manufacturing determines the fit; and the post-installation finish secures everything that has been put in place. For such work, SJB Sash Windows has been manufacturing and installing bespoke timber sash windows across London since 2001, bringing the material quality and installation standard that period properties demand.
Book a free survey today and receive a no-obligation quote built around the specific requirements of the property.


